2016 INDEX

Friday, August 31, 2018


August 31, 2018 – Fast tip/trick – sort of a slight of hand & Index

         After being off my feet to heal my hamstring I had to attack the jungle of weeds that had grown up for the last 6 to 8 weeks.

         I have a sky pencil holly near the front of the house that seems to have more wild morning glories than I can keep weeded.  During my being laid up, it became entangled all the way to the top – six feet with this wild morning glory vine.

         I was hot and sticky from fighting with the very durable vine and the limbs were getting all akimbo as I yanked and eventually had to cut the vine off the shrub.  Because I had “pushed” it too long out in the heat and the sun I didn’t want to go traipsing in with my muddy shoes, take them off, and then find the twine to snug the shrub back into it’s tall, lean, pristine look.  I’d probably just collapse in the cool house and that wouldn’t do for my nice shrub.

On a wild impulse, I cut enough of the wild morning glory vine that I’d taken off the shrub, pulled off most of the leaves and then neatly tied lengths of it around the shrub at the top and midway where the limbs were akimbo. The limbs of the shrub are now neat again.

         I thought it was a darn clever trick – it will rot away in time, but it pulled the branches back in where they belong. By the time it does rot away, the shrub will be tall, lean and pristine once more.
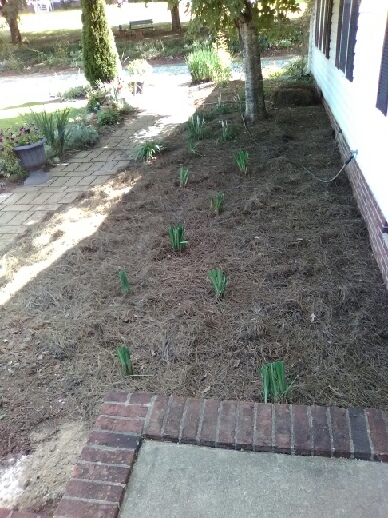
         I attempted to take a picture of it – not sure you can see the vine – but add that one to your hat tricks – it saves time taking off your muddy shoes and going in the house to “hunt” string or jute.

         Since I have half an acre of Kudzu Vine along the back property line – maybe I will just use that to strap up my leaning Chrysanthemums.  There’s an idea.


AUGUST 2018 INDEX


August 1, 2018
“I am not allowed to ask that question.”
August 2, 2018
Wisp of a memory of a checkerboard wood bowl
August 3, 2018
Funny thing, I do the same thing.
August 4, 2018
The context of a word – oligarch
August 5, 2018
Puddle walking
August 6, 2018
Hacks is now the word for tips and tricks?
August 8, 2018
Status, bit of this and that
August 9, 2018
Uncertainty, Stress, Change?
August 10, 2018
You know you are a gardener when . . .
August 21, 2018
Writer’s project for August
August 22, 2018
Lost and Found in Two Acts
August 23, 2018
Re-shrub or no shrubs at all
August 24, 2018
By product of removing shrubs – potential end table
August 25, 2018
First section of planting new front foundation
August 26, 2018
Not as I do, but as I say
August 27, 2018
Nomenclature, or what is in a name
August 28, 2018
Re-landscaping foundation without shrubs
August 29, 2018
The grocery bag trick – revisited
August 30, 2018
Revisiting Kondo’s tidying book
August 31, 2018
Fast tip/trick – sort of a slight of hand & Index


Thursday, August 30, 2018


August 30, 2018 – Revisiting Marie Kondo’s tidying book

         This is referring back to my January 16, 2017 blog about the book entitled: The life-changing magic of tidying up the Japanese art of decluttering and organizing by Marie Kondo.


         Again, a picture is worth a thousand words.


         This is my dishtowel drawer.  I have an upright secretary desk in my kitchen and I have devoted one drawer to my dishtowels.

         I tried out this theory introduced to me by Marie Kondo via her book back in January 2017.  It gives me great pleasure when I fold the towels and tuck them into the drawer.  I get just as much pleasure folding them “just so,” and pushing the group of towels to one side in the drawer and slipping the folded fresh towels in.  The drawer always stays neat.  I have some inexpensive perfumed soaps between the different colors to make them smell nice.

         I have a choice of which one I want to pull out.  The deep dark ones are high absorbent.  The red ones cheer me up and the blue ones look nice draped on the lower kitchen cabinet towel holders.

         When my brother was here in May on his vacation, I pulled open the drawer and as I was pulling out a towel, I directed his attention to my neat drawer with the cool folding technique I had learned.  “Nice – huh?” I said being very “proud” of how the drawer looked.

         I can’t remember what his comment was, it was slight derogatory disbelief with accompanied screwed up face and some sort of teasing remark like: “What they aren’t all color-coded – with the reds together?”

         Since May, the are now all color grouped – because of my dear brother, Ken’s snide remark, and I enjoy that drawer even more.

         It is one of those few instances where there is no “upkeep”.  You take one or two out, when you launder, you fold and put them back in.  It is a self-sustaining tidiness that anyone can learn.

         I also do my panties – they are color-coded – no I won’t be showing you a risqué picture of that drawer. I also do my casual clothes – pajamas, t-shirts, and grubby clothes for the garden.  I am amazed at how much more I can put in my bureau drawers using this method.

         And, sweaters are done up in other drawers.  I simply love the simplicity of it.  I love being able to pull out one and not disturb the others.  When I am done, or they are laundered and ready to be put away, I do the Marie Kondo’s special fold on them and tuck them away.

         Maybe you are ready to learn a new trick and make your life easier.

         As a side note, I sit in the day room on the loveseat and fold the laundry when I take it out of the dryer.  I fold and stack the laundry on the coffee table and then pick up each group and carry it to where it is put away.

         Often my husband watching TV mentions,

         “You sure do fold laundry pretty . . .” 

It makes me smile.  He sees me fold the dishtowels and get up and put them away only a few feet from his TV chair, but why is it he doesn’t know how to put out fresh ones when the others are tossed in the washer as he always asks,

         “Where do you keep the dishtowels,” he often asks.

         Extremely proud of my dishtowel drawer, I do not hesitate to go to the drawer and open it for him, “Here in this drawer . . . “

         For some reason he is put off by how neat it is and won’t take any towels out of it.  Maybe he is afraid of untidying my tidy drawer . . . maybe something is being lost in the translation of this situation.  Does he think only I can put them in and take them out of that drawer?

         I guess that is the next step – teaching the dear husband how to take towels out of that drawer.  I doubt I will ever show him how to fold and put them into the drawer - but half way would be an improvement.

         You too can have a tidy dishtowel drawer – just go back to my January 2017 blogs and learn about how.  Actually, go out and buy her book - it is fabulous.

         At some point I will have Marie Kondo’s tidying throughout the entire house, every room, every nook and cranny.  It is time I pull her book from the bookshelf and apply it to another region of my home.

Wednesday, August 29, 2018


August 29, 2018 – The grocery bag trick - revisited

         This blog refers back to the July 27, 2018 post where I could not sleep and learned a new trick.

         TA-DA – a picture of three of them.


           Here is a picture of three of them.  They are staged throughout the house for future use. I use them to line small bathroom wastebaskets as well as near the kitty littler box for scooping and disposing.        

          I no longer have a clutter of used grocery bags being held for some future purpose messing up my mudroom.  This process is now almost effortless  to re-cycle and re-use grocery bags.  Just takes a moment to unload your groceries, flatten and smooth the bag, fold it in half and put in the queue to be rolled up.  When I have enough empty bags, usually 12 to 14 - I take the few minutes to roll them up, stuff them in an empty plastic bottle, tape the bottom shut and viola.

         We use Cremora in our coffee and when they are empty I wash them out, peel the label off, and cut the bottom ajar – leaving a hinge and allow them to dry.  Then, I grab the flattened grocery bags that I have on the chair in the dining room.  Sometimes they are already rolled up and I've taped a used calculator tape around them to hold them in place until I get another empty bottle.  I usually put 12 to 14 bags in the roll in each of these plastic jugs. 

         
         OH, I just love it – organized – efficient – cool – useful.

         If you want to know how to do this – visit my July 27, 2018 blog – go to the bottom and there is a link that shows you how.

Tuesday, August 28, 2018


August 28, 2018 – Re-landscaping foundation without shrubs.

         This morning I dug up a clump of overgrown Siberian Iris Caesar’s Brother, Iris sibirica, and chopped it up into 9 pieces and kept some smaller clumps for bringing along in an out of the way place.  The below picture is what it looks like when it is in bloom which is usually the first two weeks of May here in my area.


         I planted them in an undulating method down the front of the foundation where I hacked out the shrubs this last month.  Then I laid in some pine straw to cover the bare ground.


         I am going to try to bring along the lamb’s-ear, Stachys byzantina via sprinkling in some seed.  I am usually successful raising lamb's-ears from seed, but I also have made note of several volunteer plants that I can transplant to quicken the process.


         The lambs ears will be set behind  and around the iris in a 4 to 5 foot undulating “dry river” type format.  Then, I am propagating some purple hearts, Tradescantia  pallida, which I will tuck in here and there next to the lamb’s-ear either at the front or the back – depending on the “digging”.  The purple will give the foundation planting a "pop" in the mid to late summer when we need it the most.


         Possibly, I will have room in the front to toss in some daffodils or red tulips this fall for some spring interest.  We will see how ambitious I am.

         Pictures are worth a thousand words.  It looks a little plain, a little small, but things grow fast and they have all fall and winter to slowly grow and “surprise me in the late spring with flowers”.  But, to me, it looks neat and under control.

         I have the area around the Maple tree planted with Liriope - Monroe - white blossoms. They didn't wilt when I transplanted them last week.  That is a good thing.

        The further end has several perennials that need to be moved later this fall and then I will be re-working that area.  It is still in the mental design phrase - I might not know what that is until I actually dig out what is there and see how the soil is.

         I will be sure to update you further when I get the rest of this together.

         But, the objective was not to plant new shrubs that I would have to trim several times a season and/or cut down in seven to ten years when they got too big.  This may be red clay -but - it sure can grow healthy shrubs that want to take over.  

        This re-planting will need a minimum of effort with a maximum of color a few times a year with the softness of the lamb's-ear river lapping at the base of the upright Siberian Iris leaves.  

     Anticipated maintenance will be to cut back the Liriope leaves to the ground in January to the ground and sprinkle a handful of Osmocote on all the vegetation.  Trim the Siberian Iris spent blooms off in late May and dead head the lamb's-ears after they flower - saving the seed to share with others.  I'll let the purple hearts sprawl as they want to - trim them to propagate more  if too large and in the fall - just cut them to the ground when they have been frosted.  Not much upkeep from my point of view.

        More pictures to come - in the spring when it is more established.  

        I hope this inspires you to do something different when you yank out your old shrubs and decide to plant something more "time friendly" in your gardens.


August 27, 2018 – Nomenclature, or what is in a name?

         Nomenclature, noun:  the term or terms applied to someone or something.

         Since I’ve lived in several regions of this country over the course of my life time I do realize that nomenclature is often regional or societal [social status] driven.

         The “eye of the stove” for some means the burner on the top, for me it means the oven window.  My southern friends had a good laugh with that one.

         Face cloth vs. wash cloth.

         Hose pipe vs. garden hose

         Vehicle vs. car or truck

         Or, one time I reserved a rental “car” and they delivered an “SUV”. 

         You get the idea, I called my living room the “drawing room” back at Trojan Lane because I had it done in English Hunt style that sported hunting horn book ends, and hunting club prints. It was my idea of a drawing room that I’d read about in countless Agatha Christie mystery books. The locals either shot me a questioning look, or let out an almost inaudible gasp.  A few laughed and many just shook their heads – obviously, they felt I was putting on airs.

         At this home, I call it our “day room” as the home is designed with a formal living room [which I turned into an office – and will be turned back into a living room this winter when I am not gardening]. We don’t have a family living here, just two people, and it is the room – or actually the open area of the large kitchen and large living area - where we spend most of our day. Therefore, I call it our “day room”.  I image people will think I am putting on airs again.

         But, this blog is about the term “mudroom”.   But, first some personal history so you know where I am coming from.

My Mom and Dad had a cellar – we didn’t call it a basement – where the washing machine and dryer were.  We accessed it by the ‘cellar’ stairs or in the summer when Dad was working in the yard and gardens, through the walk-in cellar door – wide enough for a lawn tractor.   

         In the summer, when we were kids, we had chores and one was hanging out the laundry on the line, which Martha Stewart coined as “drying yard” about 20 years ago putting a new spin on it.

         So, my parents didn’t have a mudroom, per se, as it was in the cellar.  We didn’t call it the laundry room either, as it was the entire cellar with the washer and dryer in one corner.

         At the first home we rented, I naturally called the back entrance that had the washer and dryer the “mudroom” because we would walk into that room and could kick off our shoes if we wanted to, but seldom did. 

         At my first home in this county, I had a basement, which I also called a cellar on many occasions because that word is fixed in my vocabulary. I called my cellar a basement because it had three casement windows and a door like the main house upstairs. We whitewashed the walls and made it an extra room where we had the kerosene heater to warm up the basement and thereby warming up the upper level of the house during the winter and especially during the ice storms when we lost electricity. 

It had sun shining in during the days where one corner had the washer and dryers and a folding laundry table, and the other corner had my husband’s workbench and tools.  It was still a basement or cellar as it had a cement floor.

         My current home has a “mudroom” which is the back entrance and has a washer and dryer and additional refrigerator and baskets for our trash recycling.  I also have my pots and pans hung up on the walls in that room and it does have the electrical circuit breaker box.  It is rather small.  I drop my muddy shoes in the mudroom.  It gets dirty quickly with clutter of all kinds.

         I was reading a magazine article, yes, the same article I cited yesterday about REAL LIFE from the editor’s letter and I chuckled aloud.   Let me quote it for you.

“ . . . not everyone can have a luxurious back entryway like Amanda Reynal’s mudroom (page 35). In fact, until I started working in magazines, I had never heard the term.  My mom called the room near our back door a utility room.”

         Utility room – HMMMM – a utility to me is the electric and telephone as in “pay your utility bills” on a monthly basis.  Why does anyone call a room with a washer and dryer a utility room, why not a laundry room?

         I’d never heard it called utility room, so part of me wondered what part of the country the editor had grown up in or currently lived in.

         But, since I have a mudroom I immediately flipped to page 35 to peruse the pictures.  SWANK is what I would call the layout in the magazine.  A huge room and nothing like my little mudroom, my little “muddy” room, my little room that has more clutter than any other room in the house. 

Yes, my little mudroom that has the only wallpaper in the house, that expensive English Ivy wallpaper by Waverly.  The only room I tried to wallpaper in that expensive, difficult wallpaper . . . . where I managed only to complete two walls before I ran out of money and patience.


         What was that phrase my Mom used to say?  “You can’t make a silk purse out of a sow’s ear.”

         I will continue to call it my mudroom – it isn’t elegant like the photo display in that recent magazine, but I sure did try to make a silk purse out of it with that expensive English Ivy wallpaper. 

Yes, it is worthy of the name, mudroom, as it has ‘muddy shoes’ or mud on the floor just about at all times.  I call it like it see it, literally, my mudroom.

Sunday, August 26, 2018


August 26, 2018 -  Not as I do, but as I say

         I was astonished at the same time I was amused by the Editor in Chief’s comments in the September 2018 Better Homes and Gardens magazine in his Editor’s Letter entitled “REAL LIFE”.

         Stephen Orr actually admitted that when you walk into his home it is not photo-worthy.  He tells the readers he has bargain curtain panels tacked up – “yes, they are literally hung up with tacks” in his living room.  He admits his storm doors stick or “fly open in the slightest breeze when they aren’t secured by wire”.

         Wire?  How about upgrading that to a latch and hook like we had to when the wind took our storm door and slammed it the day we moved into our new home.

Our sad storm door at the back of the house, still for some unknown reason, is often caught by the wind and it whams and bams against the railing in a “heart-beat” [a phrase I picked up when we lived in Delaware].  

In the twenty years we have lived here, we have suffered with that door. It is on my fix-it list, but it is the back entrance, and we have been putting up with it. [I fear that when we do have a new door installed, it will last only a few days before the wind takes that and busts it up, too.]

Then, Orr reports a female colleague said to him, “Isn’t it amazing what you learn to live with around the house?”

It is true, not everyone’s house is picture perfect every minute of the day.  When you are in the middle of cooking . . . you’ve utensils and pots and pans and dishes to be washed.  When you are having your coffee. . . the newspaper is littered between one reader and the next.  When you bring in groceries, it takes a little bit to put them all away.  And, then, there is the constant laundry, beds stripped and waiting to be made and laundry to be switched from washer to dryer to fold and put away.

I’ve never visited anyone’s home where every room and nook and cranny was “picture-perfect” and ready for a photo shoot, including my own.

It’s finally nice, to know I belong to a distinguished club.  That club of knowing what needs to be fixed and not being able to get all my fix-it projects done yet. Knowing that not every room has to be picture perfect; knowing that I, as well as possibly the majority of the world, “learn to live” with a bit of things to be fixed or painted or some daily clutter or a two-week layer of dust and three loads of laundry waiting on me as “I live life”.

So, do take the advice Orr suggests when you are perusing a home and garden magazine or architectural design magazine:

Come away with ideas, inspiration, and appreciation that you are living the real life and most of us do have items on the to-do list or fix-it list we haven’t gotten around to yet. 

It’s okay. We are real people with real lives.

Saturday, August 25, 2018


August 25, 2018 – First section of planting new front foundation

         In between the down pours, we have had over the last several days I have been working on the front foundation area.  Previously I described how I had taken out the shrubs and my theories on not replanting with shrubs but with low growing herbaceous perennials.

         Yesterday I dug out a clump of orange tiger lilies and two different colors of iris. In my prowling of the rain and wind damage around my yard, I happened upon a white blooming Liriope – Monroe - that was in an out of the way place and should be up close and personal as the blooms are so beautiful in August.

         Yesterday morning it was cool and overcast and I accomplished a lot.  Once I’d trimmed the leaves on the good pieces of the two different colored iris, I dug up the Plum Tart Gladiolas. They are a wicked purple that is stunning.  I haven’t seen any for sale for many years and I kept every bulb including the baby bulbs for that very reason.  I have them drying for next year’s planting.

         The final project of the day was digging up the established clump of white blooming Liriope and chopping it up into smaller pieces and setting it out around the maple tree at the front of the house.  Due to the rains, the soil was soft and easy digging.  After planting, I watered them in and mulched the area. 

         I’ve set a large black pot to the right side to assess my future design.  Where the black pot is, I am considering planting a maidenhair grass that has that white stripe down the center to play off the trunk and the dark green Liriope leaves.  The grass is cut down once a year, the Liriope is trimmed down once a year and the blooms pulled out a few months after they have bloomed.  I consider that low maintenance.


         The half-moon directly in front of the maple screams for spring crocus bulbs.  That is doable as fall is soon approaching.


      Six feet of the 42 feet is partially done.  Stay tuned for additional plantings.


Friday, August 24, 2018


August 24, 2018 – By product of removing shrubs – potential end table

         Searching the internet for ways to remove shrub stumps other than a landscaper coming in and grinding them up, I noticed many articles about copper nails versus stump killer chemicals.

         I am not a poison chemicals type person – unless it is poison ivy.  But, I don’t want to poison the soil of my front yard with chemicals because I do want to plant perennials that are low growing.

         In the midst of searching for how to kill off stumps, I noticed a comment that caught my attention along with photos.

         “Make a table out of a stump – or seating . . .”

         I saw pictures of trunks that had been turned into stylish end tables.

         HMMMMMM – I had 4 trunks out front waiting to be hauled off.  They were all branching trunks – all interesting wood and ready and waiting for some cleverness and creativity.  And, the best part,  . . . FREE!

         We discovered the cut trunks were too heavy to lift by one person and even a struggle with two people.  My husband was getting out his electric chain saw in order to cut them into pieces so we could get them into the pickup truck without busting a gut.

         As he was going out the door, I asked.  “Can you cut one of them at 24 inches from the bottom for me so I can make an end table?”

         He stopped and considered it and I continued. 

“Here is the tape measure, here is a sharpie – I like that one – it has multiple trunks and is the most interesting.”

         I was surprised that he didn’t call it a hair-brained idea.  He dutifully cut the one I had picked out and I had him drag it to the top of the steps.


         Later I pulled it inside the house and assessed it.  Yes, it will make something interesting.  I would need to peel the outside bark off it to get it down to the pretty wood.  It was gouged in a few places and the bark was green and about 1/8th the below the surface I could see blondish wood.

         A few days later, as there was nothing on TV of interest and I was bored I thought about the four-stem trunk in the next room.  I grabbed an old blanket and pulled out a ‘staple puller’ I’d used when I removed the rug when I put down lament floor a few years back.  I rolled the stump onto the blanket and set to work.


          Two hours later, with sticky fingers, all the bark was removed revealing the blondish wood. I would need to get out my Dremel drill to work on the knot areas of the stump where the limbs had been cut, but it was looking good already.


Forgive me, I was not positioned correctly when I took the second picture but you can see, the crazy project is coming along.

         Now, I need to let it dry out before I sand it and move on to the varnish and then glass tabletop.

         But, hopefully, this will give you an idea for an “almost” free end table or coffee table if you, too, are cutting down trees or shrubs.

         I will be back at you on this blog with further developments.


Thursday, August 23, 2018


August 23, 2018 – Re-shrub or no shrubs at all?

         That is the question I had for several days.  I have been in a battle with the Nellie Stevens Hollies that are along the front of my house.  They were robust to say the least.  During my First American Title traveling days, their pruning became almost non-existent due to time and later I tried to hack them back down to a reasonable size and shape and failed.

         I next did the Lollipop thing.  I trimmed all the lower limbs off to the trunk and then carved the tops into a round mass of foliage.  They were unusual and that look bought me a few more years. But, this year, after trimming them monthly from February through May I made the decision that they had to go.  Me standing on a step ladder was downright unsafe and the prudent me made the decision they had to be cut down.

         In June, I pulled a hamstring and the May trimming was not attended to because of vacation with my brother, and then the hamstring and suddenly it was the end of July and the centers of those shrubs are up to the rooftop.

         This realization took place one day I pulled into my driveway and paused.  This house looks like no one lives here or the gardener died. Look at those out of control shrubs.  I decided to take action – in process of healing a pulled hamstring or not.

         The next morning I went out early before the heat came up and started in on one shrub with my trust loppers. Sitting on my garden stool, I managed to cut off all the limbs until I had just the bare trunk.  One shrubs down, three to go.  I managed to get three of them done before I was overwhelmed with the heat. I tossed all the limbs onto the front lawn.  They stayed there until the next morning.


         I loaded those limbs up the next morning on the pickup truck and strapped them down.  We got rid of them at the landfill, but suddenly the truck had no brakes and we had to drop it off for emergency service.

         I needed to rest, I had overdone it with the hamstring pull.

         A few days later, I hacked up the last holly.  No truck around, I hauled the branches to the side of the house so that my neighbors would not be offended.

         I looked over the area.  In front of the four Nellie Steven’s hollies were smaller leaved holly bushes and they looked bad.  Knowing they had been trimmed down to the ground and re-grown at least three times, if not more in the last 20 years, I chopped those to the ground as well.

         When I was done, a neighbor stopped and we chatted about the shrubs.  He admitted he needed to cut a few of his out too.  He said it looked good.

The day before, I had put a phone call into my handy man, but he didn’t have time to come out to cut the stumps down for several days. 

         I casually asked if my neighbor could chop the stumps to the ground with his chainsaw and he seemed delighted to help.  So, a day later, my neighbor, good sport that he is, came up and zipped all the stumps down to the ground.


         That is what has transpired for the last two weeks.  During my travels to the grocery store and other errands I have been looking at everyone else’s shrubs.  The horrors I see out there.  Some houses you can’t even see the windows.  A friend dropped by and she mentioned the problems with foundational plantings.  I can’t remember the phrase, but she was of the opinion they are not necessary.  That gave me something to ponder.

         Why re-shrub and have to trim bushes again?  Part of the reason I cut my shrubs down was the exurbanite amount of time and energy it took me to take care of them.  Did she have a valid point – are foundational shrubs unnecessary?

         The next day I had a tire rotation appointment in Spartanburg, which is an hour’s drive away, and I specifically glanced at all the homes along the way and assessed that there are three types of homes.  No shrubs at all, some houses with brand new shrub plantings, and then like mine – overgrown shrubs. 

From my non-scientific review I deduced, 40 percent had no shrubs, 50 percent had overgrown shrubs and only 10 percent had properly sheared shrubs or new plantings.  I had not realized it before that so many homes had overgrown shrubs.

         I suddenly didn’t feel bad when I realized there are only 10% of the homeowners out there that have their shrubs under control.  So, those homeowners have and “A” score and good for them I say.

         I can live with a B or lower score if I am trading time and energy for beauty and low maintenance.

         What is the key to both beauty and low maintenance?  I searched the internet and looked at dozens of low maintenance foundation plantings and I saw nothing I could live with.  Too austere, no color, no texture, and they were boring.

After reviewing a few years of several gardening magazines, i.e., Horticulture, Garden Gate and Carolina Gardener, I decided on herbaceous perennials that a woman can easily cut down at the end of the season or at the end of the blooming period – not 7 times a year like my old shrubs needed.

         In future blogs I will share my journey from cut out shrubs to new non-shrub foundation planting.  I’ve 40 feet of re-work to do. 

         I am armed with graph paper and ideas.  I will start with the plant material I can steal from other areas of my property.

         Watch for future blogs while I am on this journey.

         Here is my vote for no foundation shrubs.       R